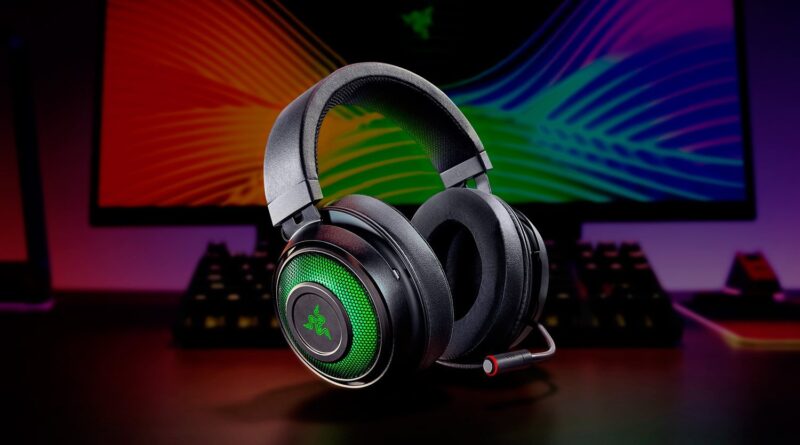
How to Clean Razer Headphones
Cleaning your Razer headset is key to keeping it in top condition and prolonging its lifespan. Whether you’re a music enthusiast, avid gamer, or regular streamer, cleaning your headphones can help ensure that they continue to deliver the best possible audio experience for years to come. So let’s take a closer look at how to clean Razer headphones.
As with any audio device, cleaning your Razer Blackshark V2 headphones properly is essential for longevity and optimal performance. The method for cleaning your Razer headphones may vary depending on the model. Here are some general guidelines to help get you started:
1. Unplug your headset from any other devices before proceeding with the cleaning process.
2. Using a slightly damp cloth or cotton swab, gently wipe away any dirt or dust from the outside of your headset. Be sure to avoid getting any liquid into the internal parts of your headset as this could potentially damage it.
3. Using a soft-bristled brush, like a toothbrush, lightly scrub away any grime that may have built up on the headset’s metal frame and ear pads.
4. To clean the internal components (such as wires and ports) of your headphones, use an air duster to blow away any debris that may be present. However, do not use compressed air cans for this purpose as their pressure is too high and can cause irreparable damage to delicate circuits inside your headphones.
5. To disinfect your headset, you can use a mild cleaning solution such as rubbing alcohol or white vinegar diluted in water and spray it onto a cloth before wiping the exterior of your headphones. Be sure to avoid getting any liquid into the internal parts of your headset as this could potentially damage it.
6. Allow your headset to air-dry completely before putting them back on and plugging them into any other devices.
Precautions To Take While Cleaning Razer Headphones
1. Do not submerge your Razer headphones in water as this could damage internal components or ruin the finish of your headset.
2. Never use strong solvents such as acetone, paint thinner, or anything abrasive to clean your headphones as these will likely erode the surface material of your headset and cause permanent damage.
3. Avoid using compressed air cans to blow away dirt and debris from inside the circuitry of your headphones as their pressure can potentially cause irreparable damage to delicate circuits inside your device.
4. When spraying any cleaning solution onto a cloth for disinfecting purposes, be sure to avoid getting any liquid into the internal parts of your headset as this could potentially damage it.
5. Store your Razer headphones away from direct sunlight and extreme temperatures as these can damage the internal components of your headset and lead to premature failure.
6. Lastly, never use a hair dryer or heat gun to try and speed up the drying process for your headset as this could also cause permanent damage to its internal components.
Follow these guidelines for cleaning and maintaining your Razer headphones properly so that you can enjoy crystal-clear sound quality for years to come!
Items required to clean headphones
Items required to clean headphones
-Soft cloth or cotton swab: Using a soft cloth or cotton swab is the most common way for cleaning any headset. It’s important to note that when using a damp cloth, it should only be slightly damp and avoid getting any liquid into the internal parts of your headset as this could potentially damage it.
-Soft-bristled brush, like a toothbrush: This type of brush is perfect for removing dirt and grime from the metal frame and ear pads of your Razer headphones, as well as other hard-to-reach areas. A soft-bristled brush is also ideal for scrubbing away dust and lint that may have built up in the crevices of your headsets.
-Air duster: An air duster can be used to blow away any dust or debris that may have accumulated inside the circuitry of your headset. However, do not use compressed air cans for this purpose as their pressure is too high and can cause irreparable damage to delicate circuits inside your headphones.
-Mild cleaning solution such as rubbing alcohol or white vinegar diluted in water: For disinfecting purposes, you can use a mild cleaning solution such as rubbing alcohol or white vinegar diluted in water and spray it onto a cloth before wiping the exterior of your headphones. Be sure to avoid getting any liquid into the internal parts of your headset as this could potentially damage it. Additionally, make sure not to use strong solvents such as acetone, paint thinner, or anything abrasive to clean your headphones as these will likely erode the surface material of your headset and cause permanent damage.
The Bottom Line
Cleaning your Razer headphones is an important part of keeping them in top working condition. Be sure to use the appropriate cleaning method and supplies for your specific model, avoid submerging your headset in water and never use strong solvents or compressed air cans to clean the internal components of your device. With proper care, you can enjoy crystal-clear sound quality from your Razer headphones for years to come!


